
Prerequisites
Before proceeding, ensure that your development environment meets the following requirements:
- Video SDK Developer Account (Not having one, follow Video SDK Dashboard)
- Have Node and NPM installed on your device.
Important: One should have a VideoSDK account to generate token. Visit VideoSDK dashboard to generate token
Getting Started with the Code!
Follow the steps to create the environment necessary to add audio calls into your app. You can also find the code sample for quickstart here.
First create one empty project using mkdir folder_name on your preferable location.
Install Video SDK
Import VideoSDK using the <script> tag or Install it using the following npm command. Make sure you are in your app directory before you run this command.
1<html>
2  <head>
3    <!--.....-->
4  </head>
5  <body>
6    <!--.....-->
7    <script src="https://sdk.videosdk.live/js-sdk/1.1.1/videosdk.js"></script>
8  </body>
9</html>1npm install @videosdk.live/js-sdk1yarn add @videosdk.live/js-sdkStructure of the project
Your project structure should look like this.
1  root
2   ├── index.html
3   ├── config.js
4   ├── index.js
You will be working on the following files:
- index.html: Responsible for creating a basic UI.
- config.js: Responsible for storing the token.
- index.js: Responsible for rendering the meeting view and the join meeting functionality.
Step 1: Design the user interface (UI)
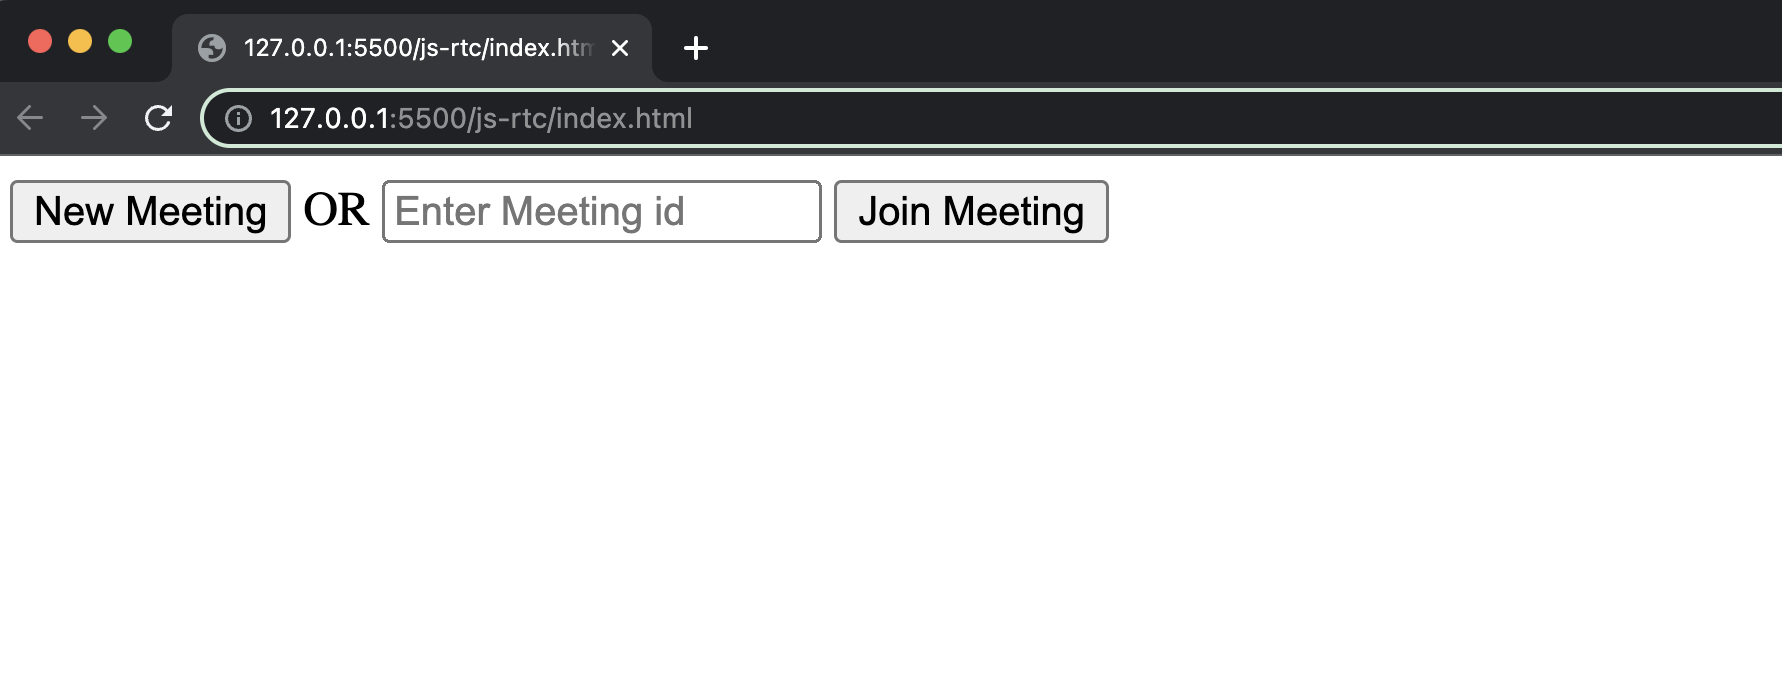
Create an HTML file containing the screens, join-screen and grid-screen.
1<!DOCTYPE html>
2<html>
3  <head> </head>
4
5  <body>
6    <div id="join-screen">
7      <!-- Create new Meeting Button -->
8      <button id="createMeetingBtn">New Meeting</button>
9      OR
10      <!-- Join existing Meeting -->
11      <input type="text" id="meetingIdTxt" placeholder="Enter Meeting id" />
12      <button id="joinBtn">Join Meeting</button>
13    </div>
14
15    <!-- for Managing meeting status -->
16    <div id="textDiv"></div>
17
18    <div id="grid-screen" style="display: none">
19      <!-- To Display MeetingId -->
20      <h3 id="meetingIdHeading"></h3>
21
22      <!-- Controllers -->
23      <button id="leaveBtn">Leave</button>
24      <button id="toggleMicBtn">Toggle Mic</button>
25
26      <!-- render Participants -->
27      <div class="row" id="participantContainer"></div>
28    </div>
29
30    <!-- Add VideoSDK script -->
31    <script src="https://sdk.videosdk.live/js-sdk/1.1.1/videosdk.js"></script>
32    <script src="config.js"></script>
33    <script src="index.js"></script>
34  </body>
35</html>
Output
Step 2: Implement Join Screen
Configure the token in the config.js file, which you can obtain from the VideoSDK Dashbord.
1// Auth token will be used to generate a meeting and connect to it
2TOKEN = "Your_Token_Here";
Next, retrieve all the elements from the DOM and declare the following variables in the index.js file. Then, add an event listener to the join and create meeting buttons.
1// Getting Elements from DOM
2const joinButton = document.getElementById("joinBtn");
3const leaveButton = document.getElementById("leaveBtn");
4const toggleMicButton = document.getElementById("toggleMicBtn");
5const createButton = document.getElementById("createMeetingBtn");
6const participantContainer = document.getElementById("participantContainer");
7const textDiv = document.getElementById("textDiv");
8
9// Declare Variables
10let meeting = null;
11let meetingId = "";
12let isMicOn = false;
13
14function initializeMeeting() {}
15
16function createLocalParticipant() {}
17
18function createParticipantElement() {}
19
20function createAudioElement() {}
21
22function setTrack() {}
23
24// Join Meeting Button Event Listener
25joinButton.addEventListener("click", async () => {
26  document.getElementById("join-screen").style.display = "none";
27  textDiv.textContent = "Joining the meeting...";
28
29  roomId = document.getElementById("meetingIdTxt").value;
30  meetingId = roomId;
31
32  initializeMeeting();
33});
34
35// Create Meeting Button Event Listener
36createButton.addEventListener("click", async () => {
37  document.getElementById("join-screen").style.display = "none";
38  textDiv.textContent = "Please wait, we are joining the meeting";
39
40  // API call to create meeting
41  const url = `https://api.videosdk.live/v2/rooms`;
42  const options = {
43    method: "POST",
44    headers: { Authorization: TOKEN, "Content-Type": "application/json" },
45  };
46
47  const { roomId } = await fetch(url, options)
48    .then((response) => response.json())
49    .catch((error) => alert("error", error));
50  meetingId = roomId;
51
52  initializeMeeting();
53});
Step 3: Initialize meeting
Following that, initialize the meeting using the initMeeting() function and proceed to join the meeting.
Since this is an audio only call, pass webcamEnabled: false so the participant publishes the microphone alone and the browser never asks for camera permission.
1// Initialize meeting
2function initializeMeeting() {
3  window.VideoSDK.config(TOKEN);
4
5  meeting = window.VideoSDK.initMeeting({
6    meetingId: meetingId, // required
7    name: "Thomas Edison", // required
8    micEnabled: true, // optional, default: true
9    webcamEnabled: false, // audio only call, so the camera stays off
10  });
11
12  meeting.join();
13
14  // Creating local participant
15  createLocalParticipant();
16
17  // Setting local participant stream
18  meeting.localParticipant.on("stream-enabled", (stream) => {
19    setTrack(stream, null, meeting.localParticipant, true);
20  });
21
22  // meeting joined event
23  meeting.on("meeting-joined", () => {
24    textDiv.style.display = "none";
25    document.getElementById("grid-screen").style.display = "block";
26    document.getElementById(
27      "meetingIdHeading"
28    ).textContent = `Meeting Id: ${meetingId}`;
29  });
30
31  // meeting left event
32  meeting.on("meeting-left", () => {
33    participantContainer.innerHTML = "";
34  });
35
36  // Remote participants Event
37  // participant joined
38  meeting.on("participant-joined", (participant) => {
39    //  ...
40  });
41
42  // participant left
43  meeting.on("participant-left", (participant) => {
44    //  ...
45  });
46}
Output
Step 4: Create the Media Elements
In this step, Create a function to generate the participant and audio elements for displaying both local and remote participants. Set the corresponding media track for the audio stream.
1// creating participant element
2function createParticipantElement(pId, name) {
3  let participantFrame = document.createElement("div");
4  participantFrame.setAttribute("id", `f-${pId}`);
5
6  let displayName = document.createElement("div");
7  displayName.innerHTML = `Name : ${name}`;
8
9  participantFrame.appendChild(displayName);
10  return participantFrame;
11}
12
13// creating audio element
14function createAudioElement(pId) {
15  let audioElement = document.createElement("audio");
16  audioElement.setAttribute("autoPlay", "false");
17  audioElement.setAttribute("playsInline", "true");
18  audioElement.setAttribute("controls", "false");
19  audioElement.setAttribute("id", `a-${pId}`);
20  audioElement.style.display = "none";
21  return audioElement;
22}
23
24// creating local participant
25function createLocalParticipant() {
26  let localParticipant = createParticipantElement(
27    meeting.localParticipant.id,
28    meeting.localParticipant.displayName
29  );
30  participantContainer.appendChild(localParticipant);
31}
32
33// setting media track
34function setTrack(stream, audioElement, participant, isLocal) {
35  if (stream.kind == "audio") {
36    if (isLocal) {
37      isMicOn = true;
38    } else {
39      const mediaStream = new MediaStream();
40      mediaStream.addTrack(stream.track);
41      audioElement.srcObject = mediaStream;
42      audioElement
43        .play()
44        .catch((error) => console.error("audioElem.play() failed", error));
45    }
46  }
47}
Step 5: Handle participant events
Thereafter, implement the events related to the participants and the stream.
Following are the events to be executed in this step:
participant-joined: When a remote participant joins, this event will trigger. In the event callback, create the participant and audio elements previously defined for rendering their audio stream.participant-left: When a remote participant leaves, this event will trigger. In the event callback, remove the corresponding participant and audio elements.stream-enabled: This event manages the media track of a specific participant by associating it with the appropriate audio element.
1// Initialize meeting
2function initializeMeeting() {
3  // ...
4
5  // participant joined
6  meeting.on("participant-joined", (participant) => {
7    let participantElement = createParticipantElement(
8      participant.id,
9      participant.displayName
10    );
11    let audioElement = createAudioElement(participant.id);
12    // stream-enabled
13    participant.on("stream-enabled", (stream) => {
14      setTrack(stream, audioElement, participant, false);
15    });
16    participantContainer.appendChild(participantElement);
17    participantContainer.appendChild(audioElement);
18  });
19
20  // participants left
21  meeting.on("participant-left", (participant) => {
22    let pElement = document.getElementById(`f-${participant.id}`);
23    pElement.remove(pElement);
24
25    let aElement = document.getElementById(`a-${participant.id}`);
26    aElement.remove(aElement);
27  });
28}
Output
Step 6: Implement Controls
Next, implement the meeting controls such as toggleMic and leave meeting.
1// leave Meeting Button Event Listener
2leaveButton.addEventListener("click", async () => {
3  meeting?.leave();
4  document.getElementById("grid-screen").style.display = "none";
5  document.getElementById("join-screen").style.display = "block";
6});
7
8// Toggle Mic Button Event Listener
9toggleMicButton.addEventListener("click", async () => {
10  if (isMicOn) {
11    // Disable Mic in Meeting
12    meeting?.muteMic();
13  } else {
14    // Enable Mic in Meeting
15    meeting?.unmuteMic();
16  }
17  isMicOn = !isMicOn;
18});
Run your code
Once you have completed all the steps mentioned above, run your application using the code block below.
1live-server --port=8000Final Output
You have completed the implementation of a customized audio calling app in Javascript using VideoSDK. To explore more features, go through Basic and Advanced features.
Tip: You can checkout the complete quick start example here.


