
1Help me add video calling to my Android app with VideoSDK.
2
31. Create a Phone and Tablet project with an Empty Activity in Android Studio.
4
52. Add `mavenCentral()` to `settings.gradle` and
6
7   `implementation 'live.videosdk:rtc-android-sdk:2.2.0'` plus
8
9   `implementation 'com.amitshekhar.android:android-networking:1.0.2'` to
10
11   `app/build.gradle`; declare the `INTERNET`, `CAMERA`, `RECORD_AUDIO` and
12
13   `MODIFY_AUDIO_SETTINGS` permissions and set `android:name=".MainApplication"`.
14
153. Create `MainApplication` calling `VideoSDK.initialize(applicationContext)`, a
16
17   launcher `JoinActivity` that requests runtime permissions and creates a room by
18
19   POSTing to `https://api.videosdk.live/v2/rooms`, and a `MeetingActivity` plus
20
21   `ParticipantAdapter` using `VideoSDK.config`, `VideoSDK.initMeeting`,
22
23   `MeetingEventListener`, `ParticipantEventListener` and `VideoView`.
24
254. Ask me for a token from app.videosdk.live/api-keys and set it as `sampleToken`
26
27   in `JoinActivity`.
28
295. Sync Gradle and run the app on a device or emulator.
30
31REFERENCE
32
33https://docs.videosdk.live/android/guide/video-and-audio-calling-api-sdk/quick-start.md
Prerequisites
Before proceeding, ensure that your development environment meets the following requirements:
- Android Studio Arctic Fox (2020.3.1) or later.
- Android SDK API Level 21 or higher.
- A mobile device that runs Android 5.0 or later.
Important: One should have a VideoSDK account to generate token. Visit VideoSDK dashboard to generate token
Getting Started with the Code!
Follow the steps to create the environment necessary to add video calls into your app. Also you can find the code sample for quickstart here.
Create new Android Project
For a new project in Android Studio, create a Phone and Tablet Android project with an Empty Activity.
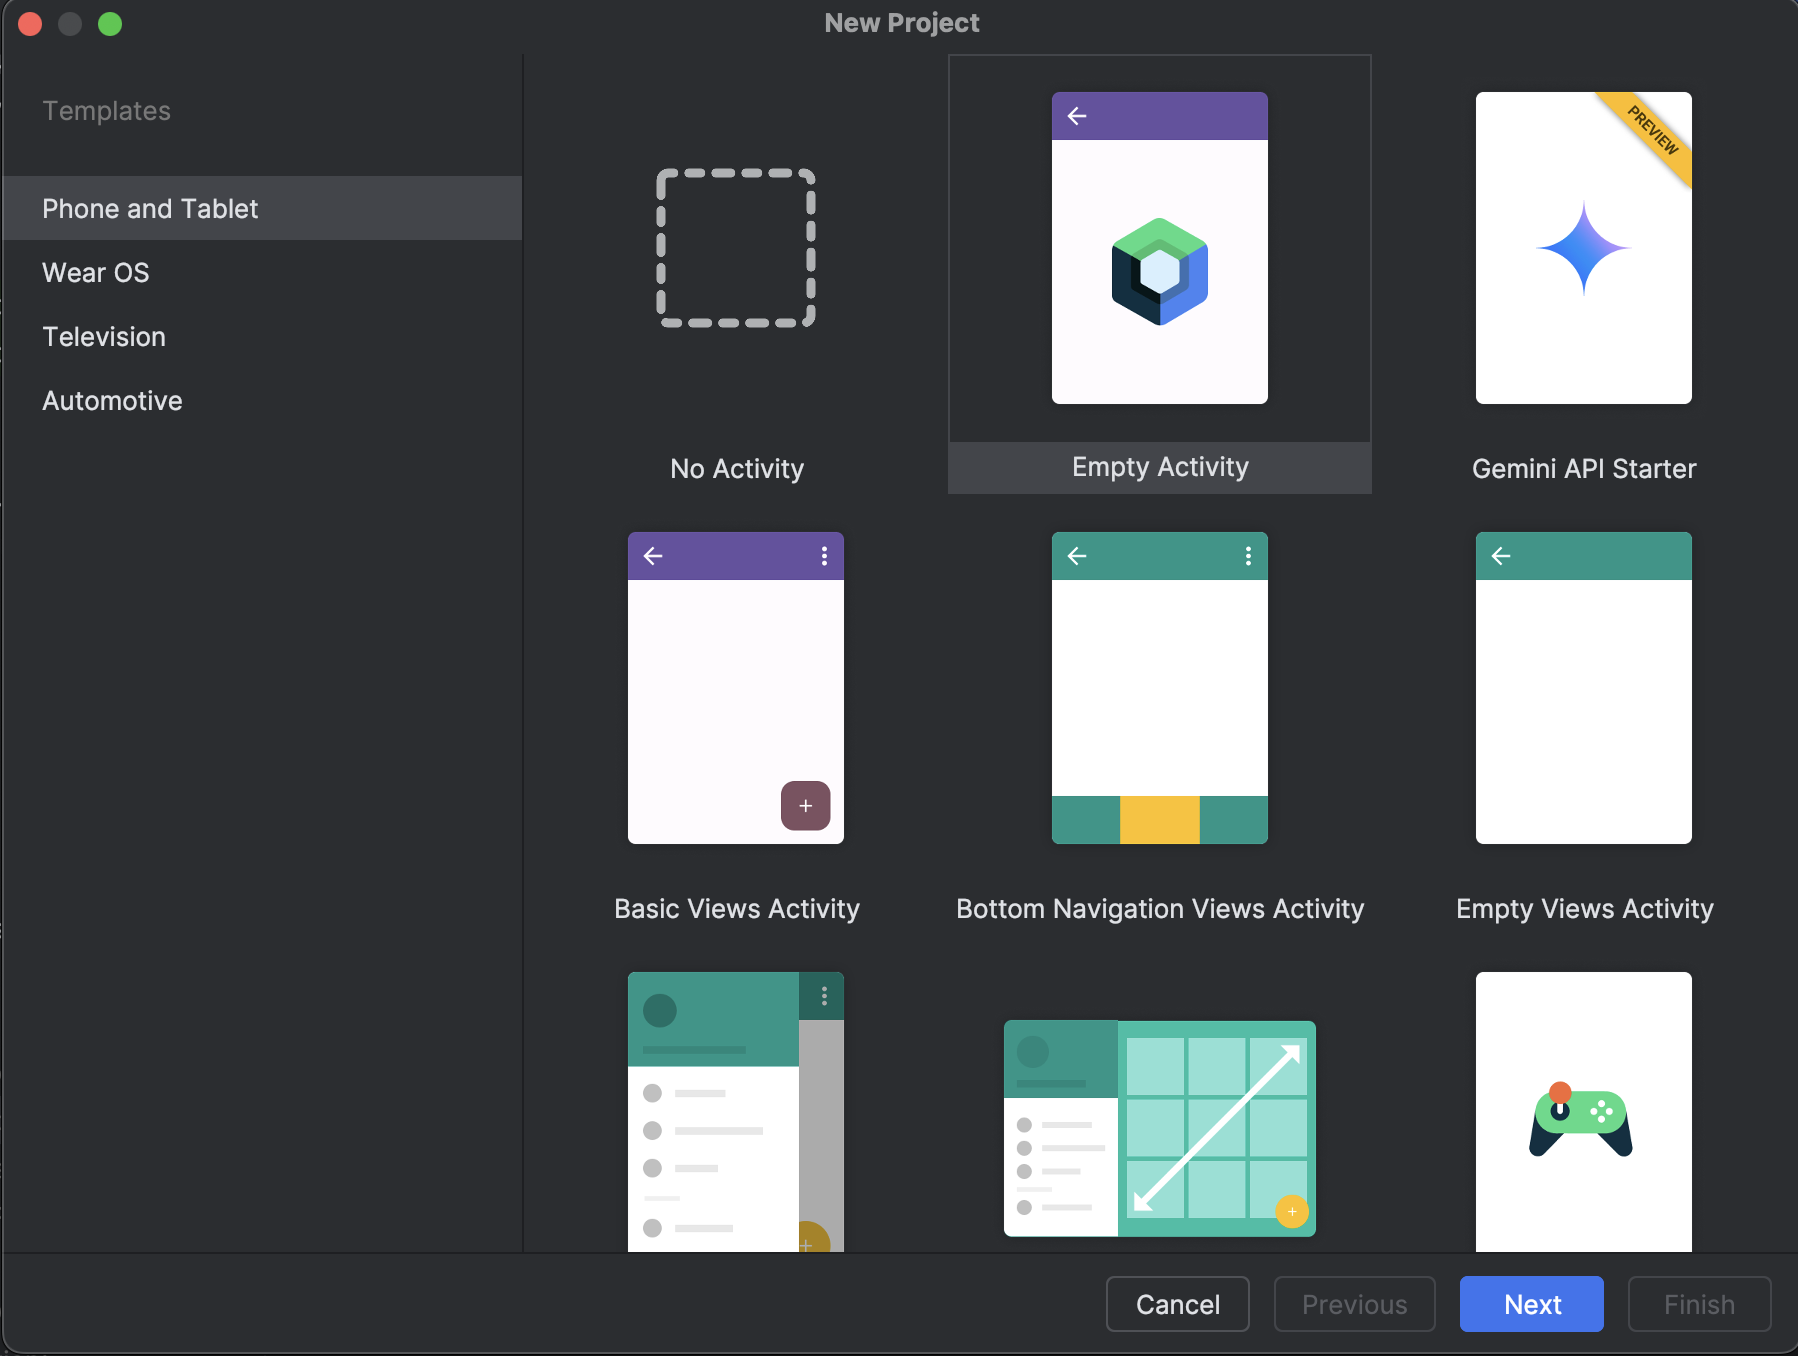
Caution: After creating the project, Android Studio automatically starts gradle sync. Ensure that the sync succeeds before you continue.
Integrate Video SDK
1dependencyResolutionManagement {
2    repositories {
3    google()
4    mavenCentral()
5    maven {url= uri("https://maven.aliyun.com/repository/jcenter")}
6  }
7}1dependencyResolutionManagement{
2 repositories {
3 google()
4 maven { url = uri("https://www.jitpack.io") }
5 mavenCentral()
6 maven {url= uri("https://maven.aliyun.com/repository/jcenter")}
7 }
8}- Add the following dependency in your app's
app/build.gradle.
1dependencies {
2  implementation ("live.videosdk:rtc-android-sdk:2.2.0")
3
4  // library to perform Network call to generate a meeting id
5  implementation ("com.amitshekhar.android:android-networking:1.0.2")
6
7  // other app dependencies
8  }
Important: Android SDK compatible with armeabi-v7a, arm64-v8a, x8664 architectures. If you want to run the application in an emulator, choose ABI x8664 when creating a device.
Add permissions into your project
- In
/app/Manifests/AndroidManifest.xml, add the following permissions.
1<uses-feature android:name="android.hardware.camera" android:required="false" />
2<uses-permission android:name="android.permission.INTERNET"/>
3<uses-permission android:name="android.permission.CAMERA"/>
4<uses-permission android:name="android.permission.RECORD_AUDIO"/>
5<uses-permission android:name="android.permission.MODIFY_AUDIO_SETTINGS"/>
Note: If your project has set
android.useAndroidX=true, then setandroid.enableJetifier=truein thegradle.propertiesfile to migrate your project to AndroidX and avoid duplicate class conflict.
Structure of the project
Your project structure should look like this.
1app/
2├── src/main/
3│   ├── java/com/example/app/
4│   │   ├── components/
5│   │   ├── screens/
6│   │   ├── navigation/
7│   │   ├── ui/
8│   │   │   └── theme/
9│   │   ├── model/
10│   │   ├── MainApplication.kt
11│   │   ├── MainActivity.kt
12│   │   └── NetworkClass.kt
13│   ├── res/
14│   └── AndroidManifest.xml
15├── build.gradle
16└── settings.gradle
App Architecture
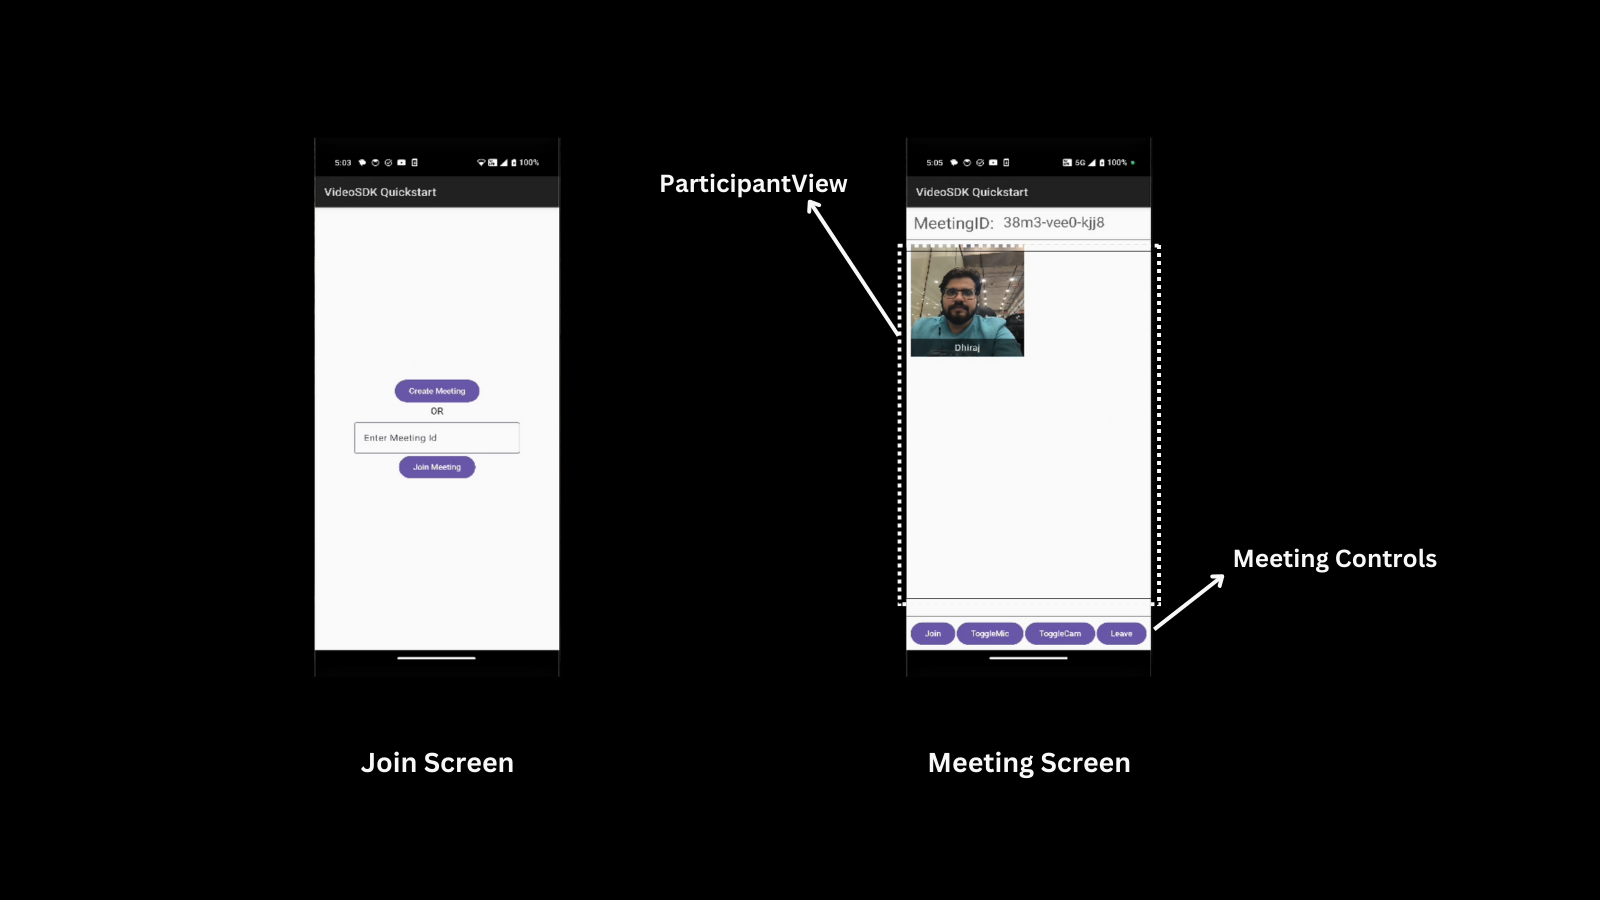
Step 1: Initialize VideoSDK
- Create
MainApplicationclass which will extend theandroid.app.Application.
- Create field
sampleTokeninMainApplicationwhich will hold the generated token from the VideoSDK dashboard. This token will use in VideoSDK config as well as in generating meetingId.
1import android.app.Application
2import live.videosdk.rtc.android.VideoSDK
3
4class MainApplication: Application() {
5
6    val sampleToken = "YOUR_TOKEN" //paste your token here
7
8    override fun onCreate() {
9        super.onCreate()
10        VideoSDK.initialize(applicationContext)
11    }
12}- Add
MainApplicationtoAndroidManifest.xml
1<application
2    android:name=".MainApplication" >
3   <!-- ... -->
4</application>
Step 2: Managing Permissions
The MainActivity is the entry point of the application. It handles permission requests for accessing the camera and microphone.
On creation, it checks if the required permissions (RECORD_AUDIO and CAMERA) are granted.
If not, it requests them. Once permissions are granted, it sets the content view using Jetpack Compose and initializes the MyApp composable, which contains the app's navigation and UI logic.
1class MainActivity : ComponentActivity() {
2    override fun onCreate(savedInstanceState: Bundle?) {
3        super.onCreate(savedInstanceState)
4        checkSelfPermission(REQUESTED_PERMISSIONS[0], PERMISSION_REQ_ID)
5        checkSelfPermission(REQUESTED_PERMISSIONS[1], PERMISSION_REQ_ID)
6
7        setContent {
8            Videosdk_android_compose_quickstartTheme {
9                MyApp(this)
10            }
11        }
12    }
13
14    private fun checkSelfPermission(permission: String, requestCode: Int): Boolean {
15        if (ContextCompat.checkSelfPermission(this, permission) !=
16            PackageManager.PERMISSION_GRANTED
17        ) {
18            ActivityCompat.requestPermissions(this,
19                REQUESTED_PERMISSIONS, requestCode)
20            return false
21        }
22        return true
23    }
24
25    companion object {
26        private const val PERMISSION_REQ_ID = 22
27        private val REQUESTED_PERMISSIONS = arrayOf(
28            Manifest.permission.RECORD_AUDIO,
29            Manifest.permission.CAMERA
30        )
31    }
32}
33
34@Composable
35fun MyApp(context: Context) {
36    NavigationGraph(context = context)
37}
Step 3: Setting Up Navigation
The NavigationGraph composable manages navigation between the JoinScreen and MeetingScreen using NavController.
1@Composable
2fun NavigationGraph(navController: NavHostController = rememberNavController(),context: Context) {
3    NavHost(navController = navController, startDestination = "join_screen") {
4        composable("join_screen") {
5            JoinScreen(navController,context)
6        }
7        composable("meeting_screen?meetingId={meetingId}") { backStackEntry ->
8            val meetingId = backStackEntry.arguments?.getString("meetingId")
9            meetingId?.let {
10                MeetingScreen(viewModel = MeetingViewModel(),navController, meetingId, context)
11            }
12        }
13    }
14}
Step 4: Creating Components
- Before building the individual screens, it's essential to develop reusable composable components that will be used throughout the project.
- Create a
ReusableComponents.ktfile to organize all reusable components for the project, such as buttons, spacers, and customizable text.
1@Composable
2fun MyAppButton(task: () -> Unit, buttonName: String) {
3    Button(onClick = task) {
4        Text(text = buttonName)
5    }
6}
7@Composable
8fun MySpacer() {
9    Spacer(
10        modifier = Modifier
11            .fillMaxWidth()
12            .height(1.dp)
13            .background(color = Color.Gray))}
14@Composable
15fun MyText(text: String, fontSize: TextUnit = 23.sp) {
16    Text(
17        text = text,
18        fontSize = fontSize,
19        fontWeight = FontWeight.Normal,
20        modifier = Modifier.padding(4.dp),
21        style = MaterialTheme.typography.bodyMedium.copy(fontSize = 16.sp),
22        color = MaterialTheme.colorScheme.onSurface.copy(alpha = 0.7f)
23 )}- Create a
ParticipantVideoView.ktfile that includes two composable functions:ParticipantVideoViewfor rendering individual participant video streams, andParticipantsGridfor displaying a grid of participant videos.
Info:
- Here the participant's video is displayed using
VideoView. To know more aboutVideoView, please visit hereVideoViewis a custom View. Since Jetpack Compose does not natively support traditionalViewobjects, we need to integrate theVideoViewinto the Compose layout using theAndroidViewwrapper.AndroidView()is a composable that can be used to add Android views inside a @Composable function.
1@Composable
2fun ParticipantVideoView(
3    participant: Participant
4) {
5    var isVideoEnabled by remember { mutableStateOf(false) }
6
7    LaunchedEffect(participant) {
8        isVideoEnabled = participant.streams.any { (_, stream) ->
9            stream.kind.equals("video", ignoreCase = true) && stream.track != null
10        }
11    }
12    Box(
13        modifier = Modifier
14            .fillMaxWidth()
15            .height(200.dp)
16            .background(if (isVideoEnabled) Color.DarkGray else Color.Gray)
17    ) {
18        AndroidView(
19            factory = { context ->
20                VideoView(context).apply {
21                    for ((_, stream) in participant.streams) {
22                        if (stream.kind.equals("video", ignoreCase = true)) {
23                            val videoTrack = stream.track as VideoTrack
24                            addTrack(videoTrack)
25                            isVideoEnabled = true
26                        }
27                    }
28                }
29            },
30            update = { videoView ->
31                participant.addEventListener(object : ParticipantEventListener() {
32                    override fun onStreamEnabled(stream: Stream) {
33                        if (stream.kind.equals("video", ignoreCase = true)) {
34                            val videoTrack = stream.track as VideoTrack
35                            videoView.addTrack(videoTrack)
36                            isVideoEnabled = true
37                        }
38                    }
39
40                    override fun onStreamDisabled(stream: Stream) {
41                        if (stream.kind.equals("video", ignoreCase = true)) {
42                            videoView.removeTrack()
43                            isVideoEnabled = false
44                        }
45                    }
46                })
47            },
48            onRelease = { videoView ->
49                videoView.releaseSurfaceViewRenderer()
50            },
51            modifier = Modifier.fillMaxSize()
52        )
53
54        if (!isVideoEnabled) {
55            Box(
56                modifier = Modifier
57                    .fillMaxSize()
58                    .background(Color.DarkGray),
59                contentAlignment = Alignment.Center
60            ) {
61                Text(
62                    text = "Camera Off",
63                    color = Color.White
64                )
65            }
66        }
67
68        Box(
69            modifier = Modifier
70                .align(Alignment.BottomCenter)
71                .fillMaxWidth()
72                .background(Color(0x99000000))
73                .padding(4.dp)
74        ) {
75            Text(
76                text = participant.displayName,
77                color = Color.White,
78                modifier = Modifier.align(Alignment.Center)
79            )
80        }
81    }
82}
83@Composable
84fun ParticipantsGrid(
85    participants: List<Participant>,
86    modifier: Modifier = Modifier
87) {
88    LazyVerticalGrid(
89        columns = GridCells.Fixed(2),
90        verticalArrangement = Arrangement.spacedBy(16.dp),
91        horizontalArrangement = Arrangement.spacedBy(16.dp),
92        modifier = modifier
93            .fillMaxWidth()
94            .padding(8.dp)
95    ) {
96        items(participants.size) { index ->
97            ParticipantVideoView(
98                participant = participants[index],
99            )
100        }
101    }
102}
Step 5: Creating Joining Screen
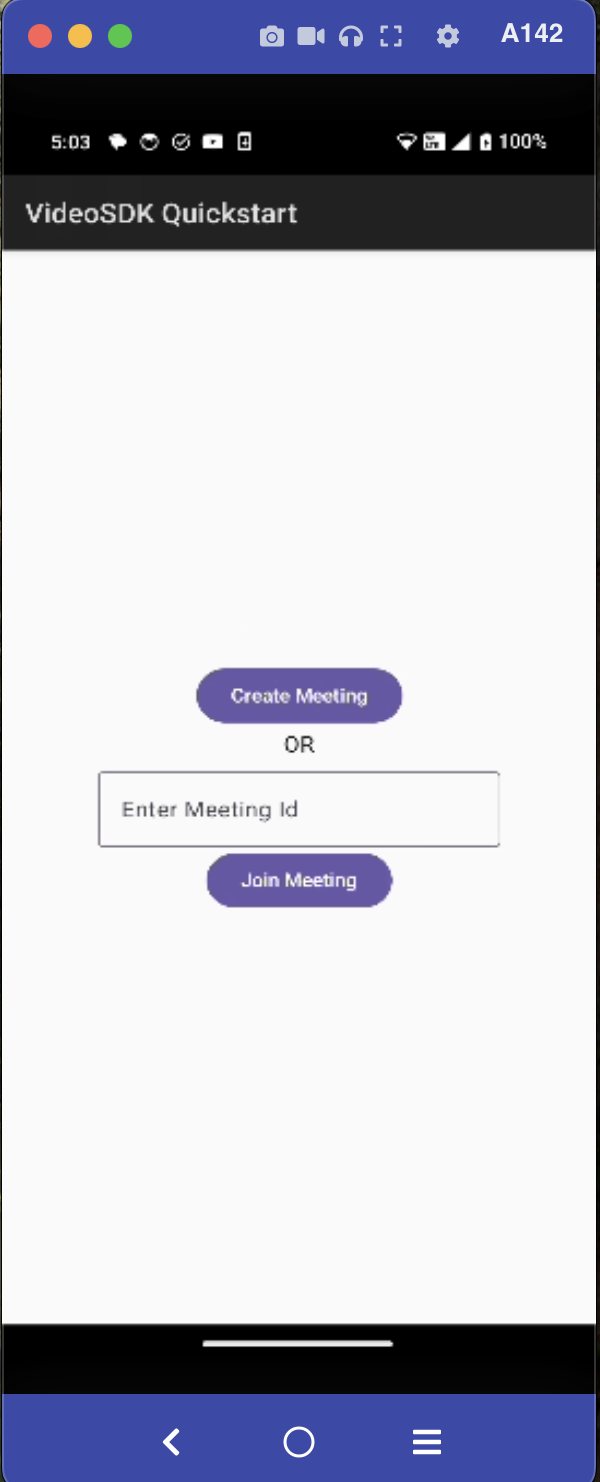
We will create a simple Join screen UI that supports two primary roles:
- Create Meeting: Starts a new meeting.
- Join Meeting: Enter a Meeting ID to join an existing meeting.
The Joining screen will include :
- Create Button - This button will create a new meeting for you.
- TextField for Meeting Id - This text field will contain the meeting Id you want to join.
- Join Button - This button will join the meeting with
meetingIdyou provided.
1@Composable
2fun JoinScreen(
3    navController: NavController, context: Context
4) {
5    val app = context.applicationContext as MainApplication
6    val token = app.sampleToken
7    Box(
8        modifier = Modifier
9            .fillMaxSize()
10            .padding(8.dp),
11        contentAlignment = Alignment.Center
12    ) {
13        Column(
14            modifier = Modifier.padding(4.dp),
15            horizontalAlignment = Alignment.CenterHorizontally,
16            verticalArrangement = Arrangement.SpaceEvenly
17        ) {
18            var input by rememberSaveable { mutableStateOf("") }
19            CreateMeetingBtn(navController, token)
20            Text(text = "OR")
21            InputMeetingId(input) { updateInput ->
22                input = updateInput
23            }
24            JoinMeetingBtn(navController, input)
25        }
26    }
27}
28
29@Composable
30fun CreateMeetingBtn(navController: NavController, token: String) {
31    MyAppButton({
32        NetworkManager.createMeetingId(token) { meetingId ->
33            navController.navigate("meeting_screen?meetingId=$meetingId")
34        }
35    }, "Create Meeting")
36}
37
38@Composable
39fun InputMeetingId(input: String, onInputChange: (String) -> Unit) {
40    OutlinedTextField(value = input,
41        onValueChange = onInputChange,
42        label = { Text(text = "Enter Meeting Id") })
43}
44
45@Composable
46fun JoinMeetingBtn(navController: NavController, meetingId: String) {
47    MyAppButton({
48        if (meetingId.isNotEmpty()) {
49            navController.navigate("meeting_screen?meetingId=$meetingId")
50        }
51    }, "Join Meeting")
52}
Output
Step 6: Creating MeetingId
The NetworkManager singleton handles meeting creation by making a POST request to the VideoSDK API:
- Meeting Creation: Sends a request to the API with an authorization token to create a meeting.
- Response Handling: Extracts the roomId from the response and triggers the
onMeetingCreatedcallback.
1object NetworkManager {
2    fun createMeetingId(token: String, onMeetingIdCreated: (String) -> Unit) {
3        AndroidNetworking.post("https://api.videosdk.live/v2/rooms")
4            .addHeaders("Authorization", token)
5            .build()
6            .getAsJSONObject(object : JSONObjectRequestListener {
7                override fun onResponse(response: JSONObject) {
8                    try {
9                        val meetingId = response.getString("roomId")
10                        onMeetingIdCreated(meetingId)
11                    } catch (e: JSONException) {
12                        e.printStackTrace()
13                    }
14                }
15
16                override fun onError(anError: ANError) {
17                    anError.printStackTrace()
18                    Log.d("TAG", "onError: $anError")
19                }
20            })
21    }
22}
Note: Don't confuse with Room and Meeting keyword, both are same thing 😃
Step 7: Creating Meeting Screen
We will create a simple Meeting screen UI with two main sections:
- Participants' Video Streams: Displays video feeds of meeting participants.
- Media Control Buttons: Includes buttons to control the mic, camera, and leave the meeting.
The MeetingScreen composable is the main UI for a video call meeting, handling meeting details and user actions. The MeetingScreen composable is organized into three sections, each serving a specific purpose:
Header: Displays the meeting ID at the top of the screen for reference.ParticipantsGrid: Shows the list of participants in a grid layout, adjusting dynamically.MediaControlButtons: A set of buttons to control the microphone, camera, and leave the meeting.
1@Composable
2fun MeetingScreen(viewModel: MeetingViewModel, navController: NavController, meetingId: String, context: Context) {
3
4    val app = context.applicationContext as MainApplication
5    val isMeetingLeft = viewModel.isMeetingLeft
6
7    LaunchedEffect(isMeetingLeft) {
8        if (isMeetingLeft) {
9            navController.navigate("join_screen")
10        }
11    }
12    Column(modifier = Modifier.fillMaxSize()) {
13        Header(meetingId)
14        MySpacer()
15        ParticipantsGrid(viewModel.participants, Modifier.weight(1f))
16        MySpacer()
17        MediaControlButtons(
18            onJoinClick = {
19                viewModel.initMeeting(context, app.sampleToken, meetingId)
20            },
21            onMicClick = { viewModel.toggleMic() },
22            onCamClick = { viewModel.toggleWebcam() },
23            onLeaveClick = {
24                viewModel.leaveMeeting()
25            }
26        )
27    }
28}
29@Composable
30fun Header(meetingId: String) {
31    Box(
32        modifier = Modifier
33            .fillMaxWidth()
34            .padding(8.dp),
35        contentAlignment = Alignment.TopStart
36    ) {
37        Row {
38            MyText("MeetingID: ", 28.sp)
39            MyText(meetingId, 25.sp)
40        }
41    }
42}
43@Composable
44fun MediaControlButtons(onJoinClick:()->Unit,onMicClick: () -> Unit, onCamClick: () -> Unit, onLeaveClick: () -> Unit) {
45    Row(
46        modifier = Modifier
47            .fillMaxWidth()
48            .padding(6.dp),
49        verticalAlignment = Alignment.CenterVertically,
50        horizontalArrangement = Arrangement.SpaceAround
51    ) {
52        MyAppButton(onJoinClick,"Join")
53        MyAppButton(onMicClick,"ToggleMic")
54        MyAppButton(onCamClick,"ToggleCam")
55        MyAppButton(onLeaveClick,"Leave")
56    }
57}
Step 8: Setting Up MeetingViewModel
The MeetingViewModel manages the meeting state, handles participants, and controls microphone and camera settings to ensure a smooth video call experience.
Managing Meeting State and Media Control:
- Meeting Initialization: Initializes the meeting with the VideoSDK and adds an event listener.
- Participant Management: Tracks participants, adding/removing them as they join/leave.
- Media Control: Toggles microphone and webcam states.
- Leave Meeting: Allows users to leave the meeting.
1class MeetingViewModel : ViewModel() {
2
3    private var meeting: Meeting? = null
4    private var micEnabled by mutableStateOf(true)
5    private var webcamEnabled by mutableStateOf(true)
6    val participants = mutableStateListOf<Participant>()
7
8    //used in MeetingScreen to handle navigation
9    var isMeetingLeft by mutableStateOf(false)
10        private set
11
12    fun initMeeting(context: Context, token: String, meetingId: String ) {
13        VideoSDK.config(token)
14        if(meeting==null){
15            meeting = VideoSDK.initMeeting(
16                context, meetingId, "John Doe",
17                micEnabled, webcamEnabled, null, null, true, null, null)
18        }
19        meeting!!.addEventListener(meetingEventListener)
20        meeting!!.join()
21    }
22
23    private val meetingEventListener: MeetingEventListener = object : MeetingEventListener() {
24        override fun onMeetingJoined() {
25            Log.d("#meeting", "onMeetingJoined()")
26            meeting?.let { participants.add(it.localParticipant) }
27        }
28        override fun onMeetingLeft() {
29            Log.d("#meeting", "onMeetingLeft()")
30            meeting = null
31            isMeetingLeft = true
32        }
33
34        override fun onParticipantJoined(participant: Participant) {
35                participants.add(participant)
36        }
37
38        override fun onParticipantLeft(participant: Participant) {
39            participants.remove(participant)
40        }
41    }
42
43    fun toggleMic() {
44        if (micEnabled) {
45            meeting?.muteMic()
46        } else {
47            meeting?.unmuteMic()
48        }
49        micEnabled = !micEnabled
50    }
51
52    fun toggleWebcam() {
53        if (webcamEnabled) {
54            meeting?.disableWebcam()
55        } else {
56            meeting?.enableWebcam()
57        }
58        webcamEnabled = !webcamEnabled
59    }
60
61    fun leaveMeeting() {
62        meeting?.leave()
63    }
64}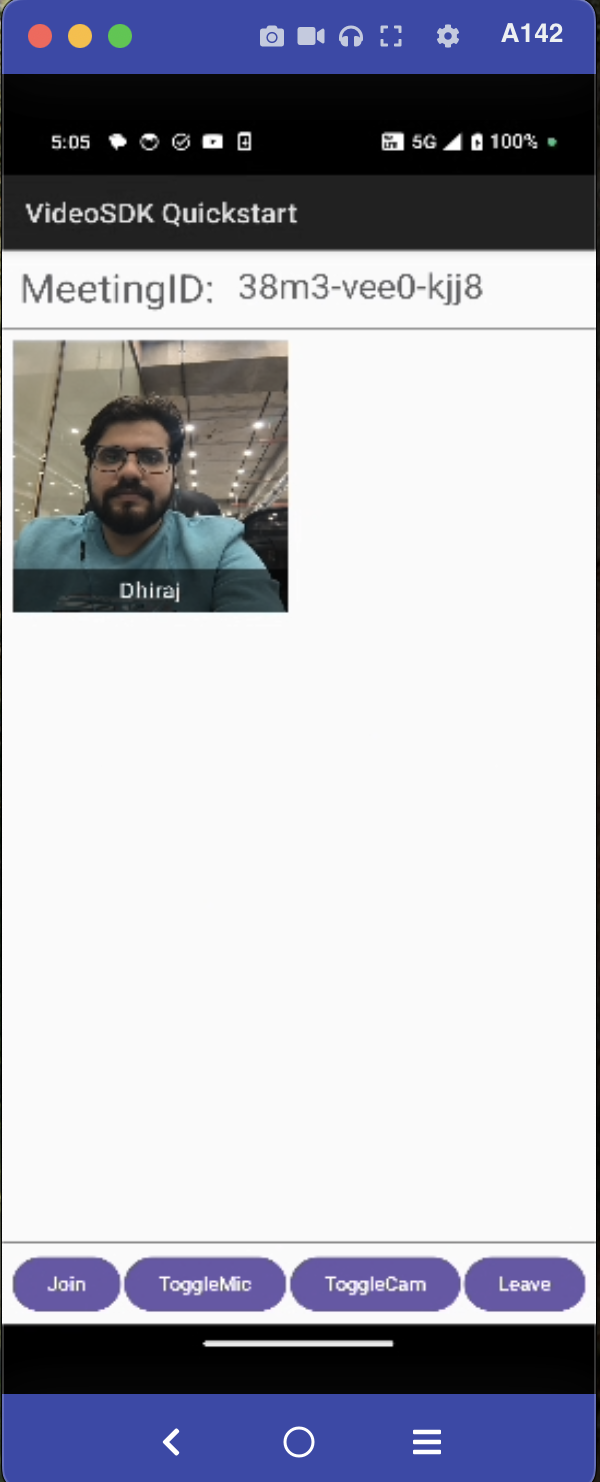
Final Output
We are done with implementation of customised video calling app in Android using Video SDK. To explore more features go through Basic and Advanced features.
Tip: You can checkout the complete quick start example here.


